Friday, December 27, 2013

Today's Brilliant Idea: Butterscotch Snowflakes
 

There is no recipe for this post, per se, just a brilliant idea, but with some work involved! I've had a recipe for butterscotch gingerbread I've been wanting to try, but I'd already made gingerbread men with chocolate chip eyes for Christmas this year, so I "tweaked" a packaged sugar cookie mix by adding a box of instant butterscotch pudding! The best idea ever! Possibly the best cookies I've ever made! Sooooo rich and decadent, and soooo pretty too!
 

The hardest part was rolling out the dough (which I refrigerated for a few hours) and cutting out the snowflakes.  I scooped store-bought vanilla frosting into a Ziploc bag, cut off the tip and piped lines on the cookies.  Then, my little "elf" helper (my 4-year-old daughter) sprinkled them with blue and white sugar. I am so in love with these right now! I may make them for every holiday; with appropriately shaped cookies! Yum!
Crabby Snacks; so festive!

 
I've been meaning to post this recipe for over a month; but it's been a little hectic around here, what with Christmas and all! I first made these yummy treats after watching Silver Linings Playbook.  The main character's mom made them to eat while watching football, and after some research, I discovered the recipe for the 1970's era appetizer. I kind of made them just for fun, but they were SO good, I've made them 3 times since! They are super tasty; all cheesy and crabby, and a bit retro too!


Crabby Snacks (thanks to www.slate.com for the recipe)

1/2 cup (one stick) butter, softened
one 6-ounce can crabmeat, drained
one 5-ounce jar Kraft Old English cheese spread (this cannot be substituted for!)
1 tablespoon mayonnaise (not Miracle whip!)
1/2 teaspoon garlic powder
6 English muffins, halved, or a sliced baguette

Combine the butter, crabmeat, cheese spread, mayo and garlic powder in a medium bowl; stir.  Chill.  When ready to serve, spread mixture on bread. Place on baking sheet and broil until browned and bubbly; about 5 minutes.  Serve warm or at room temperature. 
 
Another version of this recipe suggests spreading the mixture on the English muffins and freezing them for 30 minutes before slicing into quarters and broiling.  I liked the bite-sized slices of baguette best. 

Sunday, December 1, 2013

Today's Brilliant Idea: Pumpkin Pie in a Jar!
 

Brilliant! I've seen this on Pinterest, of course, and just HAD to try it! Since there's no crust in my version, it's even easier to make! When I was little, my mom used to pour leftover  pumpkin pie filling into "custard cups", a.k.a. small Pyrex bowls, and bake it as a treat. I remember eating it cold from the fridge as an after school snack and thinking how decadent it was! I've never been a huge fan of the pastry crust that is de rigour with pumpkin pie; I used to scrape out the filling and leave the crust when I was a kid...so this version was perfect! I topped our "pies" with Cool Whip (a must) and sprinkled it with cinnamon - oh my! Another plus? It's so simple to store leftovers; just screw on the lid and pop into the fridge for later - sweet!


I used the recipe on the back of a can of pureed pumpkin:
 
Pumpkin Pie in a Jar (adapted from Libby's Famous Pumpkin Pie recipe)
 
3/4 cup sugar
1 teaspoon ground cinnamon
1/2 teaspoon ground ginger
1/4 teaspoon ground cloves
2 eggs
15-ounce can pureed pumpkin
12-ounce can evaporated milk
 
Combine sugar and spices in a small bowl and set aside.  Beat eggs in a large bowl.  Stir in pumpkin and sugar/spice mixture.  Gradually stir in the evaporated milk. Pour into canning jars (I used 16-ounce/2-cup wide mouthed jars).  Bake at 350 degrees for 40-50 minutes, until top is "set".  Serve immediately or refrigerate.  Yummy!!!


Saturday, November 16, 2013

Mini Pumpkin Muffins
 

We are HUGE muffin fans at my house; they are our breakfast-go-to most of the time.  I usually make big batches and freeze some for future breakfasts. This week my 4-year-old daughter was "snack leader" at preschool, so I made some cute, tiny and healthy muffins.  I may have sent along 20 bags of Scarecrow Crunch (see 11/7/13 post for recipe) too...I mostly always over-do it on "snack day"! Best of all, there were plenty of muffins left over for us, too! They are moist, a little chocolate-y and just the right size to pop in your mouth - yay!


The Best Mini Pumpkin Muffins 
adapted from Smitten Kitchen

1 cup canned pumpkin
1 cup sugar
1/3 cup vegetable oil (I used safflower)
2 large eggs
1 teaspoon pumpkin pie spice
1/2 teaspoon baking soda
a dash salt
1 1/2 cups flour
1/2 cup (or so) mini chocolate chips

Preheat oven to 350 degrees and grease the cups of a mini muffin tin VERY WELL.  In a large bowl, combine pumpkin, sugar, oil, eggs, spice, baking soda and salt.  Add flour and stir until just smooth. Carefully fold in chocolate chips.  Divide batter among greased muffin cups, filling each just a bit more than 3/4 full.  Bake for 10-14 minutes or until golden brown and a toothpick inserted in the center comes out clean. Cool and eat right away or store in an airtight container and keep refrigerated.  Enjoy!
 

Thursday, November 7, 2013

Something new: a crafting playdate!
 

I got this great idea, after seeing "crafternoon" posts on a bunch of blogs online, to do some crafts during playdates.  And, I don't mean do crafts with the kids, I mean the mommies craft (and drink coffee, and eat goodies, and gossip, and vent) while the kiddos play! Today was the first one, at my house, and I tried out three things I recently found on Nora's blog at www.justmakestuff.com.  She's awesome! Check her out some time!
      First, we made cute ribbon covered tea lights, which were supposed to be washi tape covered tea lights, but my closest retail store had NO washi tape (guess I need to make a run to Michael's or Hobby Lobby in the near future)! Double-sided tape and cute grosgrain ribbon worked just brilliantly (see above photo).


 Then we covered jars I've squirreled away in my craft supply closet with fabric, paper, ribbon, etc. to create candle holders.


And, you don't think I'd do a post without a recipe, do you?  I served pumpkin bars with cream cheese frosting and made Scarecrow Crunch to send along home. Great seasonal snack mix! I'm thinkin' of sending this to Regan's preschool for her snack day!
 
Scarecrow Crunch (a big thanks to www.justmakestuff.com)
 
4 cups crunchy oatmeal cereal squares
4 cups tiny pretzels
a 22-ounce bag autumn mix candy corn
2 cups Reeses Pieces
2 6-ounce boxes/bags caramel popcorn with nuts
a box (6-7 ounces) chocolate Teddy Grahams
 
Combine all ingredients in a large bowl. Makes 15 cups.


Doesn't that look festive?
 
 
Now, if I could just stop making THESE!

Tuesday, October 15, 2013

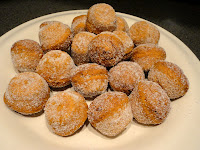
Pumpkin Spice Mini Doughnuts
 

This morning while making coffee, I suddenly had a craving for pumpkin doughnut holes. Changing out of pajamas and driving to the supermarket did NOT sound like fun, so I dug through my pantry. Inspired by numerous Pinterest recipes calling for canned pumpkin and boxed cake mix, I whipped up my own pumpkin muffin/doughnut concoction. I did consult a few "mom blogs" to check baking temperatures and times. Let me tell you, this recipe is easy, quick and sooooooo delicious! My 4-year-old daughter gobbled down 3 on the spot, while they were still warm! And my house smells better than any old Yankee Candle scent!
 
Pumpkin Spice Mini Doughnuts 
 
one box spice cake mix
one 15-ounce can pumpkin
granulated sugar
 
Combine the cake mix and canned pumpkin and blend till smooth. If you have a mini doughnut pan, it's WAY easier to fill if you put the batter into a resealable plastic bag, cut off the tip and pipe into the pan (see photo of my little "helper" below). If you don't have a mini doughnut pan, mini muffin tins work just as well; then you can call them "doughnut holes" instead!


Bake at 325 for 8-10 minutes.  I took the mini doughnuts out at 8 minutes, and the mini muffins at 10 minutes.  Scoop some granulated sugar into a resealable plastic bag, throw the still very warm muffins/doughnuts inside and shake to coat. These were amazing while still warm! Enjoy


Saturday, October 5, 2013

A Seasonal Treat: Apple Butter!
 

Since we picked bushels and bushels of apples recently, I've had to come up with several different uses for them. I've already made applesauce, apple dumplings and apple crisp. I've never made apple butter before, but my maternal grandmother used to spend hours each fall in her church basement making vats of it with her church-lady friends.  
 
Online, I found recipes for making apple butter on the stove top or in a crock-pot. I was in a hurry, so I opted for the quicker version (only a few hours, not overnight)! No matter how much seasoning I added, it just tasted like cinnamon applesauce to me, but maybe that's how it's supposed to taste! Never fear, it really is good! Try it and see!
 
Apple Butter (adapted from www.bettycrocker.com)
 
12 medium tart cooking apples, peeled, cored and cut into quarters
1 1/2 cups brown sugar
1 1/4 cup apple cider
1 Tbl ground cinnamon
1 Tbl lemon juice
1 tsp ground allspice
1 tsp ground nutmeg
1/2 tsp ground cloves
 
Combine all ingredients in a big pot.  Heat to boiling, stirring occasionally.  Reduce heat, cover and simmer for one hour. Let cool slightly.  Mash apples with a potato masher (or fork), or puree in blender or food processor. Return to pot and cook on low heat for one or two additional hours, stirring occasionally, until mixture is very thick.  Let cool. Spoon into containers and store in refrigerator for up to 3 weeks, or freeze.