Saturday, February 18, 2012

A Spring-like Supper


It's been cold and cloudy lately, so last night, to lift our spirits a little, I made a very Spring-like lemon-peppery supper! I marinated boneless, skinless chicken breasts (see "recipe" below) and then my husband grilled them (we grill year-round).  I served the chicken with lemon-pepper fettuccine (also see "recipe" below) and steamed peas (the last freezer bag of last year's garden harvest - so sad). The smells coming from my kitchen were very uplifting, despite the fact that it still gets dark around 6:00 pm here!
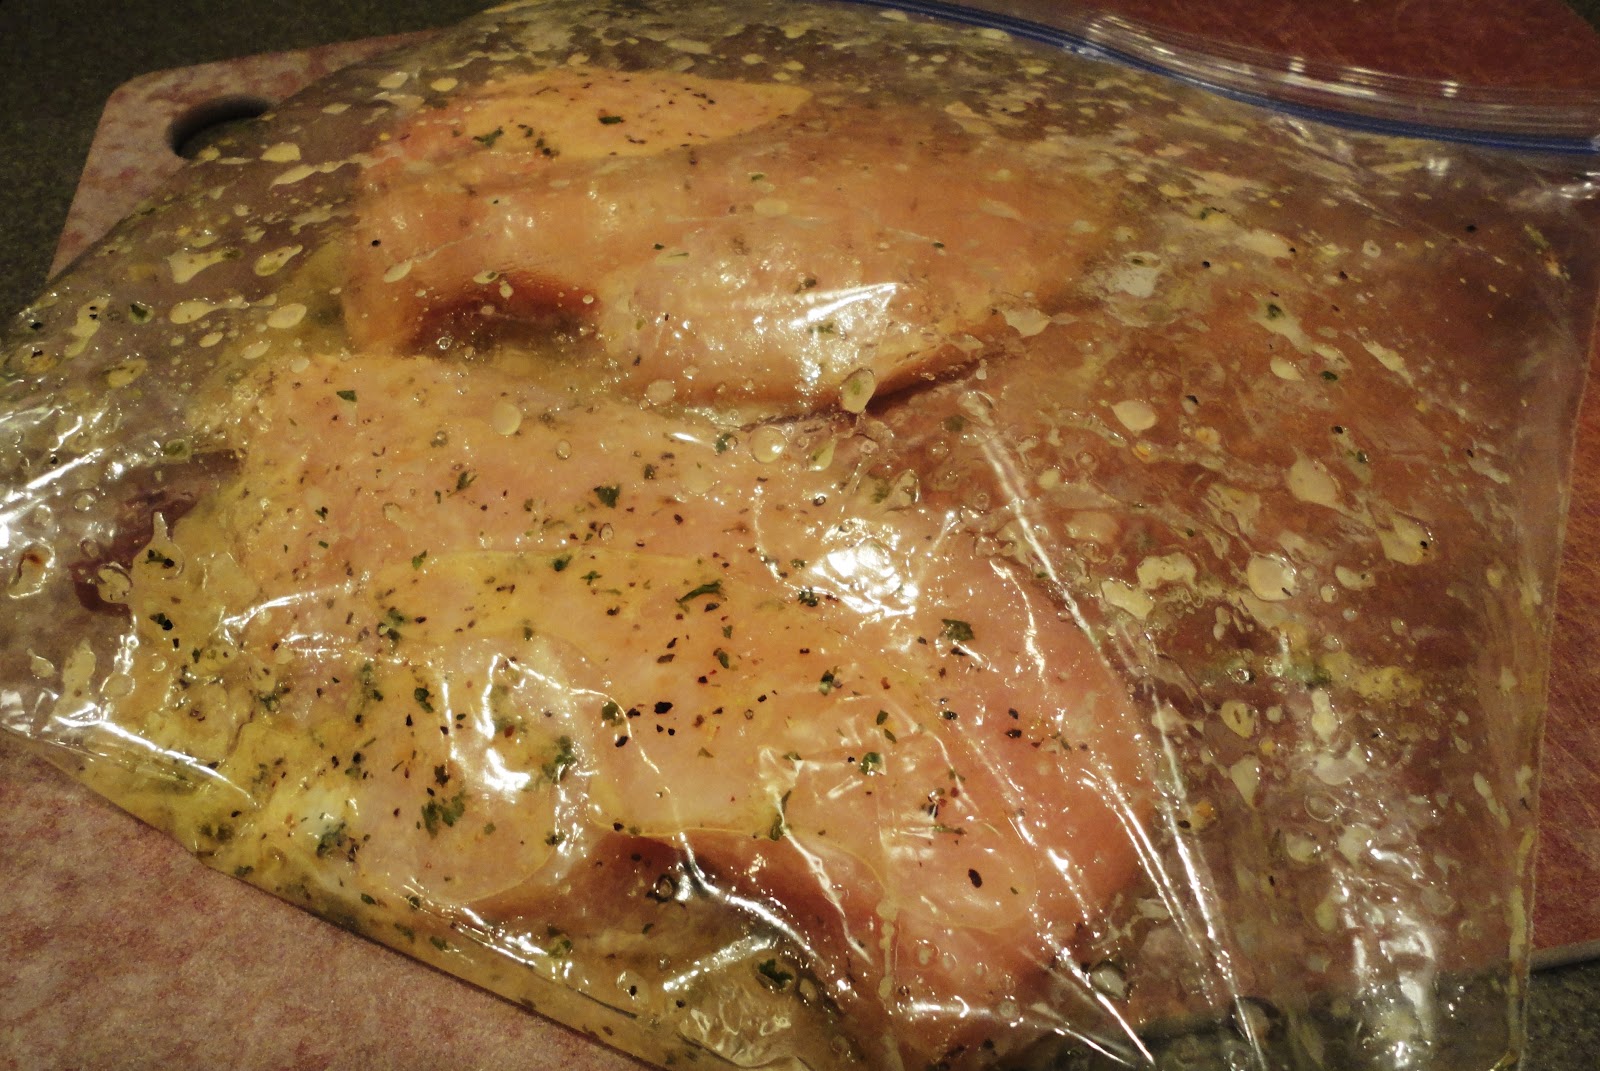

Lemon-pepper Chicken (otherwise known as "what I threw together last night")

two large boneless, skinless chicken breasts
1/4-1/2 cup olive oil
a few splashes lemon juice
lemon pepper seasoning
parsley flakes

Combine olive oil, lemon juice and seasonings in a gallon Ziploc bag.  Add chicken and shake to cover with marinade.  Let set in refrigerator for at least half an hour. Grill until meat is no longer pink.


Lemon-Pepper Pasta (again, there's no formal recipe, I just "threw it" together)

1/2 pound lemon pepper pasta (okay, so that's kind of cheating; who cares?)
a few tablespoons butter or margarine
Parmesan cheese
parsley flakes
freshly ground black pepper

Prepare pasta per package requirements.  Drain and return to pan.  Toss pasta with butter until well coated.  Add Parmesan cheese and parsley flakes and stir until well coated.  Top with additional Parmesan cheese and black pepper before serving.

Wednesday, February 15, 2012

Sweets for the Sweet!


Unfortunately for some of my friends and family, our house is a Diabetics nightmare right now! Blame Valentine's Day. Blame wintry weather that makes me want to both bake and EAT. Blame all the pretty colors, smells and tastes!


(You have to admit these are super cute!)


What's worse is that in addition to the heart-shaped goodies that invaded my house this week, we still have Snickerdoodles left over from last week's play date (see February 10 post) and half a loaf of banana bread with red raspberries (see February 12 post)! So, what did I do for our stay-at-home-with-a-cranky-preschooler Valentine's dinner? Bake a dessert, of course!

I had originally planned to grab a box of brownie mix at the supermarket earlier this week, but, when shopping with a three-year-old, it's hard to stick to the list; with all the "distractions"! Any-whoo, I figured I could make brownies from scratch, which believe it or not, I've NEVER done! Seriously, it's hard to believe! And you know what? They are crazy easy! Save yourself a few bucks next time and make them yourself!  For Valentine's Day, I served them with vanilla ice cream, strawberries and chocolate syrup - oh my!


Mmm-Mmm Better Brownies (adapted, just a little, from www.allrecipes.com)

1/2 cup melted butter
1 cup sugar
1 tsp. vanilla extract
2 eggs
1/2 cup flour (this is NOT a typo)
1/3 cup unsweetened cocoa powder
1/4 tsp. baking powder
1/4 tsp. salt
1/2 cup chocolate chips

Preheat oven to 350 degrees.  Grease a 9 x 9-inch baking dish.  In a medium bowl, mix together the butter, sugar and vanilla.  Beat in eggs.  Combine flour, cocoa, baking powder and salt; gradually stir into the egg mixture until well blended.  Stir in chocolate chips.  Spread the batter evenly into the prepared pan  Bake 20-25 minutes, or until the brownie begins to pull away from the edges of the pan.  Let cool on a wire rack before cutting into squares.


Anyone want to help me eat these?

Sunday, February 12, 2012

Keepin' Busy!


We're having a "typical" February here in the Midwest; clouds, snow and cold temperatures, so I've been busy "crafting" and cooking!  I made a cute and quick wreath for the front door (thank you Pinterest for giving me more ideas than I will EVER have time to do!) and...


these snowy white branches (with glitter) to perk up the kitchen sink area (as mentioned in a January post).


And, of course, I've been baking! This is another new recipe I'm trying out on all of you, my loyal followers! Never fear, I don't post a recipe until after I've tasted it - what quality control!  I don't know where I found this recipe (well, I'm pretty sure it was on the Internet). I've been waiting for a time when I had some extremely ripe bananas and a free hour, or so. It was worth the wait - it was super yummy! Heck, the name should say it all:

Banana Bread with Raspberries

1/2 cup butter, softened
1 cup sugar
2 eggs
1 tsp. vanilla extract
1 1/2 cups all-purpose flour
2 tsp. cinnamon
1 tsp. nutmeg
1 tsp. baking soda
1/2 tsp. salt
1 cup sour cream
2 bananas, "rotten"
cinnamon and sugar mixture
1-2 cups frozen raspberries, thawed

Preheat oven to 350 degrees.  Grease a 9 x 5-inch loaf pan and sprinkle with the cinnamon and sugar mixture.  In a large bowl, cream butter and sugar.  Add the eggs and vanilla, mix well.  Add in the bananas, cinnamon and nutmeg and mix well.  Combine the flour, baking soda and salt in a separate bowl.  Stir together and add to batter, mixing slowly.  Finally, fold in the sour cream.  Spread 1/3 of the batter evenly in to the prepared pan.  Top with half the raspberries.  Pour in another third of the batter.  Repeat raspberry layer.  Top with remaining batter, sprinkle with cinnamon and sugar mixture.  Bake at 350 for 50 minutes, or until a toothpick inserted into the center of the loaf comes out clean.  Cool loaf in the pan for 10 minutes before removing to a wire rack to cool completely.

* My loaf was extremely moist, so I baked it 7-8 minutes longer.  Instead of putting it on a wire rack to cool (and because it was so "wet"), I inverted it onto a plate. 

Friday, February 10, 2012

Eating Healthier!

One of my girlfriends recently was diagnosed with Type 2 Diabetes, and is totally changing her diet. As she is one-third of the "girls night" trio, her diagnosis has changed up our menus a bit - for the better! I began to get excited about all the new food combinations we'll be having on "girls night" and how all three of us will be eating healthier (at least one night a week, for two of us)! I'm now on a mission to find tasty Diabetes-friendly recipes to serve when it's my turn to host!

The food she prepared this week for "girls night" was so awesomely amazing, I just had to share it! Some of us, me included, had thirds of the lettuce wraps! Please excuse the photos; I used my cell phone camera...


Black Bean Dip with Baked Tortilla Chips

vegetable cooking spray
1/2 cup thinly sliced green onions and tops
1-2 cloves garlic, minced
1 15-ounce can black beans, rinsed and drained
3/4 cup (3 ounces) shredded reduced-fat Cheddar cheese
1/4 tsp. salt
1/3 cup vegetable broth or water
1/2 Tbl. finely chopped cilantro
baked tortilla chips

Spray small skillet with cooking spray; heat over medium until hot.  Saute onions and garlic until tender, about 3 minutes.  Process the black beans, cheese and salt in a food processor  until almost smooth, adding enough broth or water to made desired dipping consistency.  Mix in onion mixture and cilantro.  Spoon dip into bowl and serve with tortilla chips.


 Chicken Lettuce Wraps (taken from www.tasteofhome.com)

1 1/2 pounds boneless skinless chicken breasts, cubed
1 Tbl. plus 1 1/2 tsp. peanut oil, divided
3/4 cup chopped fresh mushrooms
1 8-ounce can water chestnuts, drained and diced
1 Tbl. minced fresh ginger root
2 Tbl. rice vinegar
2 Tbl. reduced-sodium teriyaki sauce
1 Tbl. reduced-sodium soy sauce
1/2 tsp. garlic powder
1/4 tsp. crushed red pepper flakes
1 1/2 cups shredded carrots
1/2 cup julienned green onions
12 Bibb or Boston lettuce leaves
1/3 cup sliced almonds, toasted

In a large nonstick skillet coated with cooking spray, cook chicken in 1 Tbl. of oil for 3 minutes; drain.  Add the mushrooms, water chestnuts and ginger; cook 4-6 minutes longer or until chicken is no longer pink.  Drain and set aside.

In a small bowl, whisk the vinegar, teriyaki sauce, soy sauce, garlic powder, red pepper flakes and remaining oil.  Stir in the carrots, onions and chicken mixture.  Spoon onto lettuce leaves and sprinkle with almonds.  If desired, fold sides of lettuce over filling and roll up.


So here's to healthier eating without sacrificing taste! More to come, I'm sure!

February Fun!


Dreary, wintry weather outside; fun fun fun inside! It's a craft-a-palooza at my house right now. We've been doing a craft (or two or three) every day, mostly because it's just not that nice outside! Some of our projects have been: wax paper and crayon hearts (see above photo),


recycled/upcycled crayons,


and, of course, valentines!


This week we had our second "crafting play date". I piled my dining room table with art supplies and encouraged the "big girls" (ages 2 1/2 and 3) to create.  They may have been more interested in the toys in my daughter's bedroom than making valentines, but it was nice to spend time "venting" with another Mommy for two hours! I made some yummy Snickerdoodle cookies too, because, well, I like cookies with my coffee! I hadn't made Snickerdoodles in years, and the first one I bit into (the night before) brought tears to my eyes as I was hit with a huge wave of nostalgia (my Mom used to make them when I was growing up). What powerful cookies! Enjoy!  


Snickerdoodles (a special thanks to my Mom, Sharol Beckner Alexander Watkins)

1 cup softened butter
1 1/2 cups sugar
2 eggs
2 3/4 cups flour
2 tsp. Cream of Tartar
1 tsp. baking soda
1/2 tsp. salt

Plus: 2 Tbl. sugar combined with 2 tsp. cinnamon

Preheat oven to 400.  Mix butter and sugar.  Add eggs.  Sift dry ingredients and stir into wet mixture.  Chill.  Roll into balls and then roll in cinnamon-sugar mixture.  Place 2 inches apart on a greased baking sheet.  Bake 8-10 minutes, or until "crinkly" on top and lightly browned.

Monday, February 6, 2012


More "football food"! I thought we needed additional snacks for our Super Bowl party, so I whipped up a new cookie recipe I've been wanting to try for a while; peanut butter chip chocolate cookies! Yum! Like brownies filled with peanut butter! I found the recipe in a magazine this past summer, but can't remember which magazine...so, I can't give credit where its due. Anyway, they disappeared in less than half an hour, so I can only assume my guests liked them! Thank goodness I ate one fresh from the oven, or I would have missed out!

Peanut Butter Chip Chocolate Cookies 

2 cups flour
1 cup unsweetened cocoa
2 tsp. baking powder
1/2 tsp. salt
1 cup (two sticks) butter, at room temperature
1 1/2 cups granulated sugar
2 large eggs
3 1/2 cups (2 10-ounce packages) peanut butter chips 

Preheat oven to 350 and line baking sheets with parchment paper or spray with a nonstick baking spray.  In a bowl, combine flour, cocoa, baking powder and salt.  Using an electric mixer, beat the butter and sugar on medium speed until fluffy.  Beat in the eggs, one at a time.  Reduce the mixer speed to low and add the flour mixture, mixing until just combined (the dough will be very stiff).  Stir in the peanut butter chips by hand.  Drop rounded tablespoon-sized mounds of batter 2 inches apart on baking sheets.  Bake until firm around the edges but still soft in the middle, 10 to 12 minutes. Let the cookies cool for 5 minutes on the baking sheets before transferring to wire racks to cool completely.


Sunday, February 5, 2012


It's football time! Tonight is the Super Bowl and of course, we're hosting a party (like we didn't just host a third birthday extravaganza...)! Which means, of course, if you've been to any of our Super Bowl parties; Stromboli! I'm also envisioning hot wings, meatballs and taco dip. Maybe I'll post photos of the spread tomorrow!

This recipe is taken from a "women's magazine" from at least a decade ago, and I've been making it for almost every Super Bowl since (three years ago, I'd just had a baby, so I pretty much slept through the Super Bowl - so no Stromboli!). it's SUPER easy and VERY tasty - especially when served with spicy mustard! Yum!

Stromboli For A Crowd

two 1-lb loaves frozen white bread dough, thawed as package directs
1 1/2 cups shredded mozzarella cheese (I used a four-cheese Italian blend)
8 ounces thinly sliced ham
8 ounces salami or pepperoni (I used both)
Glaze:
1 large egg, lightly beaten
1 tsp. water

Heat oven to 375.  Line a large (17 x 11-inch) rimmed baking sheet with foil.  Lightly coat foil with nonstick spray.  On a lightly floured surface with a floured rolling pin, roll dough to a 14 x 10-inch rectangle.  With long side facing you, and leaving a 1/2-inch border uncovered on all sides, sprinkle dough with 1/4 cup cheese.  Top with half the ham, slices overlapping; add another 1/4 cup cheese, then half the salami or pepperoni.  Press gently to pack layers, then top with 1/4 cup cheese.  Tightly roll up from long side.  Pinch together long seams and ends to seal.  Place, seam side down, on lined baking sheet.  Brush with glaze; cut 3 slits in top of each loaf (I forgot to cut the slits, and they were okay).  Bake 30 minutes or until tops are golden brown.  Let cool on pan on wire rack before slicing.  Serve warm or at room temperature.


I made a double batch and realized I need more counter space and a double oven!


The loaves can be baked up to 2 weeks ahead.  Wrap cooled loaves in foil; refrigerate up to 3 days or freeze up to 2 weeks.  If frozen, thaw overnight in the refrigerator.  To serve, heat foil-wrapped loaves in a 350 degree oven for 15 to 20 minutes and cool before slicing.